
This post was first shared on my former website, OurFiftiesFixerUpper.com, in Fall 2017. The photos were updated in December 2018.
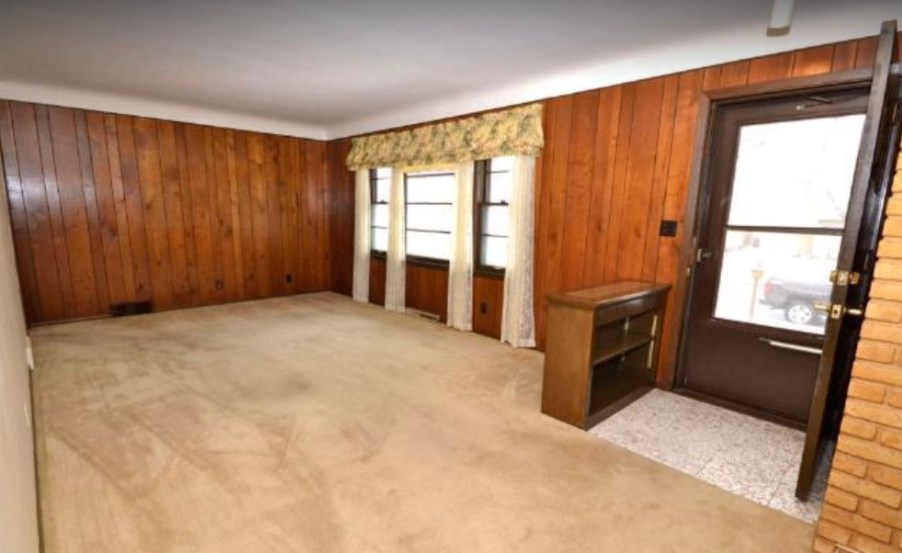
Like all classic 1950’s ranch homes, when you walk through the front door of the house you’re immediately in the living room. The first time we walked into our home, we saw a long living area that felt closed in: tan carpet, wood paneled walls, track lighting, and the classic half-wall by the front door. On the open house day, I noticed that a corner of the carpet was already peeled up so I couldn’t resist taking a peek to see what was underneath. When I saw a gorgeous wood floor, my heart skipped a beat!


We initially had just planned on doing a “makeover” of the space- we hadn’t planned on doing any major demo in the living room. After we began demo of the rest of the house, we were there late one night. My friend stopped over and we stood around and chatted over a beer. We talked about our plans for the house and found ourselves dreaming of opening up the walls in between the kitchen and living room. We thought that it would make the space feel so much more open, lighter, and brighter. The next day, we decided to go for it! We put our families to work knocking down walls and ripping out that plaster drywall.

After the wall came down, we had to obtain a permit from the city to reframe the space so that it could be completely open. Josh created a support beam for the ceiling and then stacked 2X4’s together for two support columns. We had to take caution to preserve the original textured cove ceiling, which was a piece of the 50’s character we wanted to keep.

While all of this was happening, I was hard at work ripping off the wood paneling and scraping and skim coating the walls to hide the black glue that was used on the paneling. I also whitewashed the brick surrounding our front entryway closet. We also ripped up the carpet (we hadn’t planned on doing this right away since we wanted to protect the floors, but we wanted to be able to dispose of it in the giant dumpster we had rented).


Josh had to move some electrical (another permit) and we installed a light switch and light inside the walls of the stairwell that will point down at the basement. During all of this, the windows were professionally replaced- we chose white to keep the space feeling light and bright. The last step was to refinish the wood floors and then add new baseboards. We watched YouTube videos to learn how to use the sanders that we rented from Menards, and stained and put multiple layers of polyurethane on them to finish the job. The trim we used was primed pine that I painted with white semi-gloss paint.

Reframing the stairs and ceiling made a huge difference and helped to tie our kitchen and living room together. We had to make a new attic entrance and then patched in drywall and skimcoated the entire ceiling. After the drywall was up, I finished skimcoating and painted the entire area Mindful Gray by Sherwin Williams and then refreshed the ceiling paint as well.


When we first finished the space, I was still figuring out the direction I wanted to go as far as decorating and styling, so I used items that we currently owned and only bought a couple new pieces (our media stand, a chair, side tables, and an ottoman). My decor style has changed quite a bit since then and this last fall, I redesigned the space to be more representative of the “rustic-midcentury-Scandinavian-bohemian” style combo that I’ve come to embrace. We had used reclaimed barn wood to create floating shelves in our kitchen remodel, and I thought it would be cool to tie in that same wood in the living room area. We found some awesome walnut reclaimed barnwood boards to use around the stairs- its a unique look and we’re happy with how it turned out!


Our final step to complete this space will come this summer when we start our exterior remodel. We’re going to replace the front door (I know, but it’s so perfectly MCM- why would we get rid of it?!) with one that is similar in style to the rest of the doors in our home. The current door is pretty beaten up, the lock is broken, and the lock and handle are in a very awkward spot when you’re trying to get into the house from the outside, so replacing the lock and handle wouldn’t make a difference. The new door is actually already in our garage, just waiting to be installed! Update December 2018: the new door is installed! We still have to finish trim- I will share a photo when that’s done.

We both love our new living room and we are SO glad we decided to knock down those walls- it was one of those things that was very time consuming and difficult, but the results are huge. We love that it is open concept without feeling too open- the walls surrounding the stairs help to keep it a bit more separate from the kitchen. We spend so much time in this space so we’re glad we took the time to turn it into something that we absolutely love!


If you’d like to shop this room, click here!

Hi Laura,
I stumbled upon your blog whilst looking for ideas on what to do with our living room which is similar in shape and orientation. I really love the calm, cosy and tranquil space you have created. I was wondering if you would mind sharing the dimensions of your living room please?
Many thanks,
Alex
Thanks so much, Alex! I believe it was about 14′ wide by 24′ long if I remember right. We just moved so I’m not able to measure it anymore 😉