The Final Tour of Our Completed Fifties Fixer Upper: Before & After

We spent 4.5 years renovating our first home, room by room. Our goal was always to finish it and sell it right away, and we had a buyer for it before we even finished the renovation! Although we didn’t have to list it, I still wanted to get some professional photographs of our home so we’d always be able to look back on our first home. It truly taught us so much, and kickstarted our future in ways we hadn’t even dreamed of when we purchased it.

Most “after” photos were taken by Spacecrafting Photography.

The Exterior: Front

We replaced the siding, replaced the windows, painted the gutters, replaced the doors, added light fixtures, built a front patio, removed the side door, added egress windows, and re-landscaped. The only thing we hired out here was the window replacement, which was well worth it!
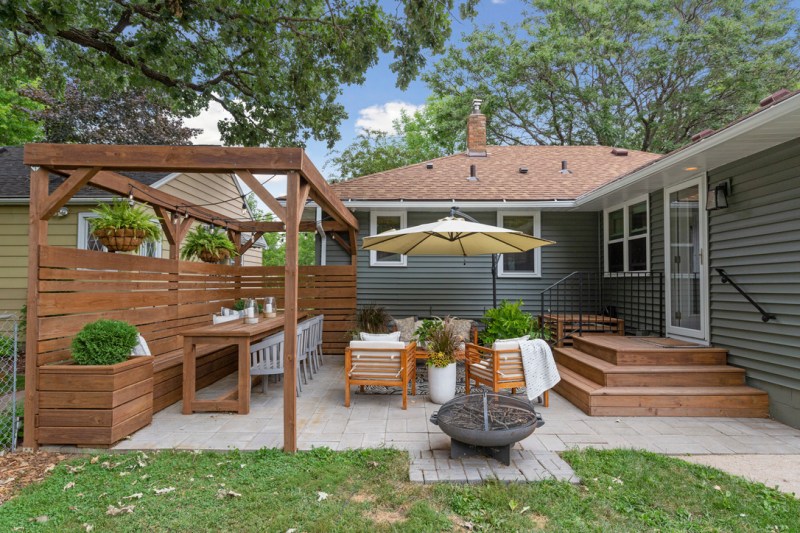
BEFORE: The listing photo, April 2016
1950's Updated Exterior, green siding with brown roof and white gutters/ Sima Spaces
AFTER: August 2020 (Pic by Spacecrafting Photography)
1950's Updated Exterior, green siding with brown roof and white gutters/ Sima Spaces
Pic by Spacecrafting Photography

The Exterior: Back

In the backyard, we continued the new siding and windows, replaced the door, painted the gutters, painted the garage doors, re-landscaped, and added a huge back patio that has a pergola, privacy fence, sitting area, and firepit area. I miss that patio so much!

BEFORE: We had replaced the windows at this point, but nothing else!
Backyard outdoor living patio with modern pergola/ Sima Spaces
AFTER: Yes, that’s the same view! Pic by Spacecrafting Photograpy
Pic by Spacecrafting Photography

Living Room

The home is a 50’s ranch-style, so you immediately walk into the living room when you walk in the front door. It was boxy, dreary, and outdated when we bought it, but by replacing and accenting the window, refinishing the existing hardwood floors, and opening up the wall to the hallway and kitchen, we gave this space a whole new life.

BEFORE: Wood paneling, carpet, and boxed-in walls!
1950's Open living room, scandinavian rustic modern style, 1950's home renovation / Sima Spaces
AFTER: Light, bright, and open!!! Pic by Spacecrafting Photography
1950's Open living room, scandinavian rustic modern style, 1950's home renovation / Sima Spaces
Pic by Spacecrafting Photography
1950's Open living room, scandinavian rustic modern style, 1950's home renovation / Sima Spaces
A view from across the room allows you to see right into the kitchen. Pic by Spacecrafting Photography

Shop the living room here.

Kitchen & Dining Room

The kitchen was dark and outdated when we moved in. We completely gutted it, added wood flooring that matched the existing hardwoods, new appliances, white cabinets, replaced the lighting, and got rid of the paneling. Removing the walls separating the kitchen, hallway, and living room made such an incredible difference as well! Read more about the transformation here.

BEFORE, looking into the dining room. Dark wood galore! (listing photo)
Remodeled 1950's kitchen, white cabinets, carrara marble countertops, subway tile backsplash, open concept kitchen / Sima Spaces
AFTER, looking into the dining room. Pic by Spacecrafting Photography
BEFORE, looking toward the front door. Don’t you love the almond appliances?!
Remodeled 1950's kitchen, white cabinets, carrara marble countertops, subway tile backsplash, open concept kitchen / Sima Spaces
AFTER, looking towards the front door. Ahh, OPEN! Pic by Spacecrafting Photography
Remodeled 1950's kitchen, white cabinets, carrara marble countertops, subway tile backsplash, open shelving, open concept kitchen / Sima Spaces
Adding open shelving allowed for a bit more “open” feeling at the end of the kitchen and gave some space for extra styling! Pic by Spacecrafting Photography
BEFORE: The dining room was a huge, ugly, open space. We added a wall to create a mudroom by the back door, got rid of the wood paneling, and replaced the tile with wood!
Remodeled 1950's dining room, modern rustic style, barndoor / Sima Spaces
AFTER: the dining room felt like a completely different space. A barndoor separates the new mudroom to the right. Pic by Spacecrafting Photograpy
Remodeled 1950's dining room, modern rustic style, barndoor / Sima Spaces
Pic by Spacecrafting Photography
Remodeled 1950's dining room, modern rustic style, barndoor, reclaimed barnwood floating shelves, kitchen styling / Sima Spaces
A closer look at the floating shelves and kitchen detail. Pic by Spacecrafting Photography

Shop the kitchen & dining room here.
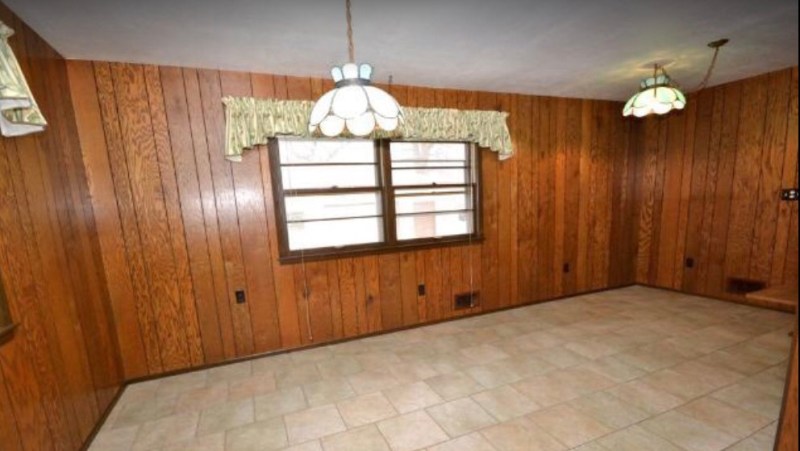
Mudroom

As mentioned, the mudroom didn’t exist when we bought this house- it was just a wide open dining room! We had more than enough room for a dining room table, and knew that adding a mudroom would make such a huge difference to the function of this back entrance.

BEFORE: A pointless extra large dining room space? (listing photo)
Modern Mudroom with white and wood builtin cubbies and benches, modern farmhouse, modern rustic mudroom / Sima Spaces
AFTER: Custom benches and cubbies, a new back door, and plenty of coat hooks gave this space a whole new feel! Pic by Spacecrafting Photography

Shop the mudroom here.

Upstairs Guest Bedroom

Our guest bedroom upstairs got a little facelift by removing the wood paneling and carpet, refinishing the wood floors, new light fixtures, doors, and window. I also added a shiplap wall! It was kind of a “leftover furniture” type of room, so the styling wasn’t my favorite, but it worked!

BEFORE (listing photo): URGH, am I right?!
Guest bedroom, neutral decor / Sima Spaces
AFTER: Just a bit cozier!!! Pic by Spacecrafting Photography
Guest bedroom, neutral decor, white shiplap wall / Sima Spaces

Shop the guest bedroom here.

Hallway Bathroom

This bathroom felt like a dark blue cave for the first two years we lived here! We completely gutted it and gave it a brand new bright, open, modern traditional look. We did this as part of the Spring 2018 One Room Challenge, so there are multiple blog posts about it, but here is the reveal.

BEFORE: see what I mean? Dark blue cave!
Modern traditional bathroom, bathroom remodel, black and white bathroom/ Sima Spaces
AFTER: bright, open, and updated!
BEFORE: just a very sad bathroom all around
Modern traditional bathroom, bathroom remodel, black and white bathroom/ Sima Spaces
AFTER: a mood booster!

Shop the hallway bathroom here.
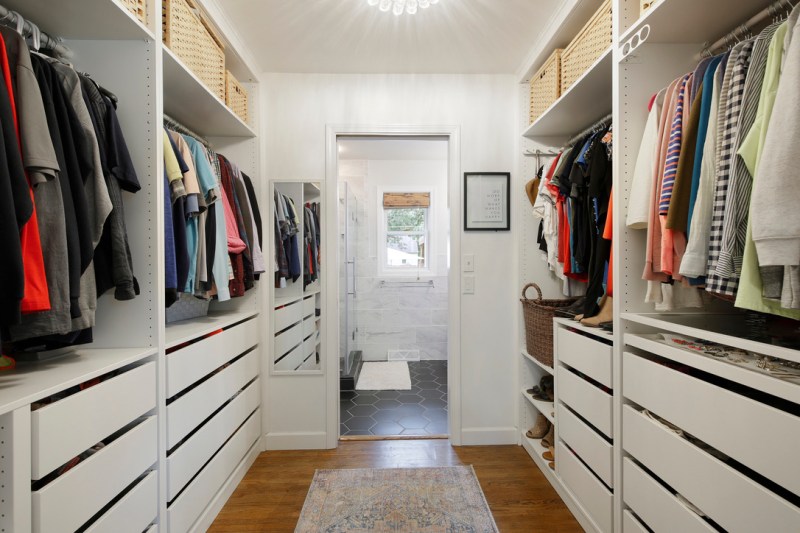
Owner’s Suite

We removed a wall between two upstairs bedrooms to create an owner’s suite situation with a walk-in closet and 3/4 bathroom. Don’t worry- we added two more bedrooms in the basement! See the transformation here.

BEFORE: how about that pepto-pink, huh?
Modern rustic bedroom, owner's suite, master suite, shiplap wall, cozy bedroom decor / Sima Spaces
AFTER: a wood-paneled wall adds warmth and the blue paint creates a bit of a moody, relaxing vibe. Pic by Spacecrafting Photography
BEFORE: This is the bedroom that turned into our closet and bathroom. The window to the right was removed, and that is now part of the closet.
Walk-in closet, walk-through closet, master closet, closet design, IKEA Pax closet design ideas / Sima Spaces
AFTER: This closet was a DREAM. I designed it to have maximum storage with a variety of drawers, hanging space, and shelves. Pic by Spacecrafting Photography
Master bathroom, owner's suite, bathroom design, 3/4 bathroom, modern bathroom design / Sima Spaces
AFTER: With the glass framed shower, white marble tile, and double vanity, our bathroom felt very spacious, even though the footprint was fairly small. Pic by Spacecrafting Photography

Shop the owner’s suite here.

Basement

Last but not least, perhaps the biggest project: the basement! We started with a half-finished 1950’s dingy, dark basement and completely gutted it, essentially doubling the usable space in the house. We created two bedrooms, added a full bathroom, a living room with a builtin fireplace and dry bar, and laundry room.

Living Room

BEFORE (listing photo): yellow wood paneling, a bar, and a charcoal grill… (yep, you read that right)
Basement builtin fireplace, basement remodel, Naval Builtin cabinets / Sima Spaces
AFTER: this was truly one of my favorite spaces in the home after it was finished. Pic by Spacecrafting Photography
Basement builtin fireplace, basement remodel, dry bar design, Naval Builtin cabinets / Sima Spaces
Pic by Spacecrafting Photography
Basement builtins, basement remodel, dry bar design, Naval Builtin cabinets / Sima Spaces
AFTER: The dry bar was such an awesome added bonus! Pic by Spacecrafting Photography
Basement builtin fireplace, basement remodel, fireplace design, marble fireplace surround, Naval Builtin cabinets / Sima Spaces
AFTER: Adding a fireplace down here made such an amazing difference. Pic by Spacecrafting Photography

Bedrooms

I’m clumping both bedrooms together because we didn’t furnish them, so they’re not very exciting to see. Again, they were gutted, reframed, drywalled, lights added, egress windows added, and closets built.

BEFORE (listing photo): Here’s a peek at the south bedroom. Yes, that’s water damage you see- we had to add a sump pump and re-grade some of the exterior landscaping.
Basement bedroom, light and bright basement bedroom / Sima Spaces
AFTER: Not terribly exciting, I know, but definitely an improvement! Pic by Spacecrafting Photography
BEDROOM #2 AFTER: This bedroom has an en-suite bathroom. The ceiling lines are funky thanks to the pipes we had to work around, but it works! Pic by Spacecrafting Photography

Basement bathroom

This space was a little complicated. When we bought the house, there was a toilet, a sink, and a shower base. We completely gutted it, replaced the plumbing, reframed, and turned it into a bright and cozy full bathroom.
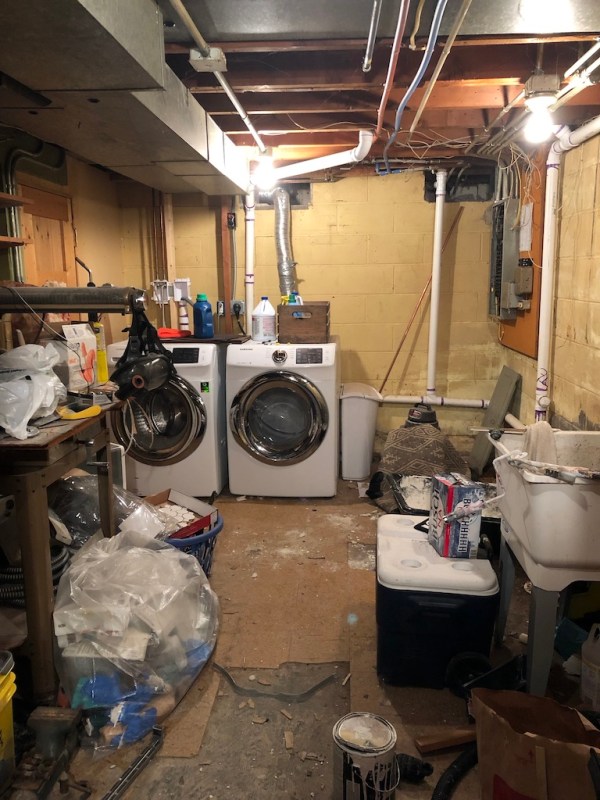
BEFORE: This is more mid-reno, after we had replaced some of the plumbing, but you get the idea!
Basement bathroom: navy, marble, gray and white bathroom / Sima Spaces
AFTER: Same view, different bathroom!

Laundry Room

Last but not least, the laundry room! If you remember, the laundry was in the kitchen when we bought the house, so we moved it to the basement. During the basement renovation, we reframed the laundry room so it could have extra space for storage and felt brighter and cleaner. We knew that a finished laundry room wouldn’t really make a difference to resale for this home, so we just freshened it up, leaving a blank slate for the new owners.

BEFORE: we had already moved the washer and dryer down here but otherwise it was a disaster!!!!
Basement laundry room / Sima Spaces
AFTER: We moved the washer and dyer location again to allow for some storage on the left side of the room. Pic by Spacecrafting Photography

And there ya have it, friends! Again- it took us 4.5 years to finish our first home because we did almost all of the work ourselves. In case you missed it, we purchased another fixer upper and will be completely renovating that too, with the goal of hiring out a little more work so it doesn’t take us quite so long! Follow along on my Instagram or subscribe to my blog so you don’t miss anything. Thanks for being here!


Click here for paint colors throughout the home.